Tutorial - Install TensorFlow GPU on Windows 10
1. Introduction
Running Tensorflow using your computer GPU can save you a lot of time when performing complex calculations involving matrices. You may wonder, why are GPUs so much better than CPU for deep learning?
Let’s start with the CPU. It stands for Central Processing Unit and it has relatively few processor cores, typically 4 or 8 these days. That means the CPU is excellent are running complex calculations but it can only do it a few at a time.
Now the GPU: it stands for Graphics Processing Unit and it is is good at doing a fairly simple calculation on large numbers of variables in parallell. For instance, if you have a large matrix and you want to to an element-wise multiplication with a matrix of the same size, that’s easy for a GPU. This comes from the fact that GPU are made to compute pixels on a screen, which requires a lot of easy calculations.
Deep learning, in particular Neural Networks (NN) and Convoluted Neural Networks (CNN) involve an enormous amount of relatively simple matrix operations and therefore the GPUs are excellent at this task.

2. Prerequisites
2.1. General
This setup is for the installation of Tensorflow 1 or Tensorflow 2 on a Windows 10 machine with the Anaconda Environment and Python 3. Most steps will be similar on another version of windows or if you don’t have Anaconda but there may be some tweaking to do.
2.2. Verify graphic card compatibility
This tutorial is for a Windows 10 machine with an Nvidia graphic card. The first thing you need to do is verify that your graphic card is able to run Tensorflow.
To see which graphic card you have:
- hit the WIndow key on your keyboard and search for System Information
- expand “Components” and click on “Display”
On the right panel, look at the name of the graphic cards. On most laptops, there is an integrated graphic chip, usually intel, and a dedicated grpahic card, in my case, an NVIDIA Geforce GTX 660M.
Once you’ve identified your graphic card, go to https://developer.nvidia.com/cuda-gpus and see if your graphic card made it. You can also look at the “Compute Capability” which will indicate how good your card will be. Mine is a 3.0 which isn’t great but I’m happy my card made it on the list so I won’t complain!
3. Setup
3.1. Update your graphic card drivers
Now that you know the name of your graphic card, go to https://www.nvidia.com/Download/index.aspx and download and install the latest drivers for your card.
Reboot after installing.
3.2. Settle on a Tensorflow version
Knowing which tensorflow version you want to use is very important to be sure all packages are compatible, but most importantly, ensure that Nvidia’s CUDA and cuDNN are compatible.
To know which version of Tensorflow you currently use, type the following commands into a Jupyter Notebook.
import tensorflow as tf
tf.__version__
'1.14.0'
You may be happy the tensorflow version you are using or you may want to update to Tensoflow 2.0. That depends on what will your usage be. In my case, I realized a little too late that a package I really like (SHAP) stoppped functionning after upgrading to Tensorflow 2.0. I decided to settle with the latest Tensoflow 1 version, which is 1.14. https://www.tensorflow.org/install/source_windows
3.3. Instal Visual Studio Express
Visual is needed to run the NVIDIA frameworks. Install Visual Studio frome here: https://visualstudio.microsoft.com/vs/express/ and install it with the defaults options. Do not select any “workload” when offered, just continue without workloads.
Reboot your PC.
3.4. Get the required CUDA and cuDNN versions
Once you know which Tensorflow version you want to use, head over to https://www.tensorflow.org/install/source_windows, and scroll down to the “GPU” table. Locate your tensorflow version and write down the Python version, CUDA version and cuDNN versions that are compatible.
Head over head to download the proper CUDA version: https://developer.nvidia.com/cuda-toolkit-archive
And go here to get the proper cuDNN version: https://developer.nvidia.com/rdp/cudnn-download Note that you will need to create a FREE developer account to access that download page, it only takes a few seconds.
3.5. Install CUDA and cuDNN
Install CUDA by simpling running the installer with the defaults options.
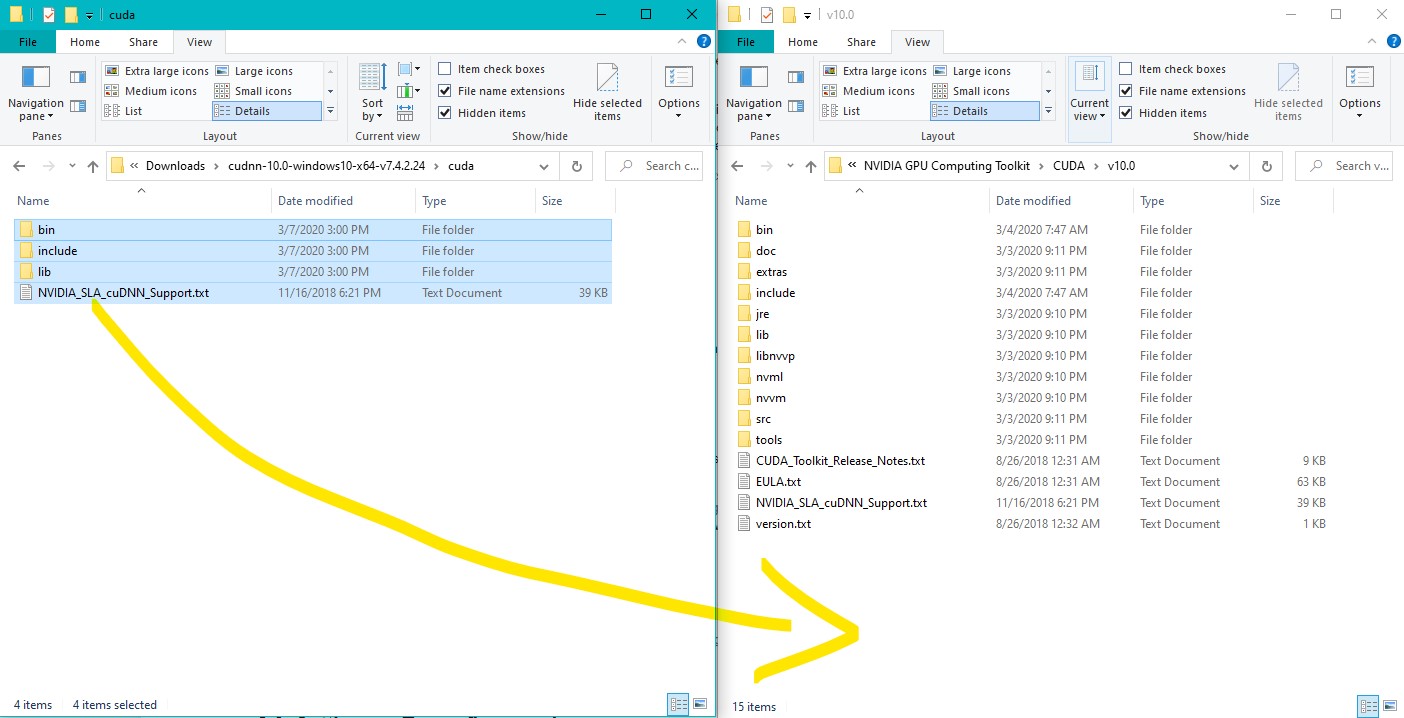
For cuDNN, it’s slighlty more involved. Extract the content of the zip file into one folder. Open the cuda folder and you should see three folder and one file. Keep that folder open and nvigate where CUDA has been installed, typically something like “C:\Program Files\NVIDIA GPU Computing Toolkit\CUDA”. In that folder, there should be another folder that’s named after the CUDA version. Go into that folder and you should see many folders including a “bin”, “include” and “lib” folder.
Now copy and paste from the cuDNN folder you had open to that folder, and make sure to overwrite any existing file if asked.
Note that it is entirely possible to have different CUDA versions installed at the same time on your computer if you want to use different version of Tensorflow. You just need to be extra careful and paste the content on cuDNN into the CUDA folder with the right version.
Reboot your computer.
3.6. Verify Windows Path
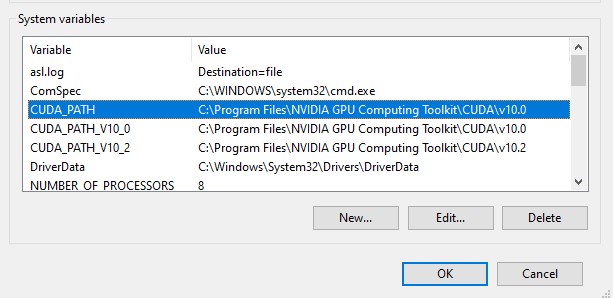
Head over to your control panel and select “Advanced system settings”. Then select the “Advanced” tab, then click on “Environment Variables…”. On the lower half of the window, you should see the “System variables”.
In there, make sure the CUDA_PATH and the CUDA_PATH_Vnn.n is set to where CUDA in installed, see picture below.
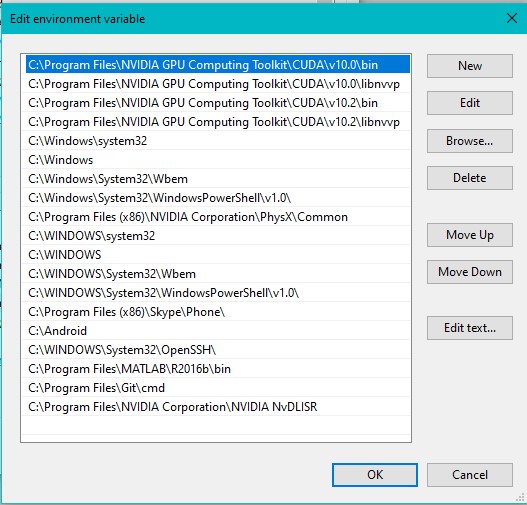
Then scroll down to the “Path” variable, and click edit. Verify that you have two paths per version of CUDA, as follows (look at the first two entries)::
3.7. Install Tensorflow-GPU
If you don’t have Tensorflow-GPU already installed, now is the time to do it!
Open Anaconda prompt and type the following, replaceing 1.14 by the version you want:
pip install tensorflow-gpu==1.14
4. Verify Installation is Succesful
Run the following two blocks of commands and verify that the first block returns (True, True) and that the second block returns your CPU and your GPU.
import tensorflow as tf
tf.test.is_built_with_cuda(), tf.test.is_gpu_available(cuda_only=False, min_cuda_compute_capability=None)
(True, True)
from tensorflow.python.client import device_lib
device_lib.list_local_devices()
[name: "/device:CPU:0"
 device_type: "CPU"
 memory_limit: 268435456
 locality {
 }
 incarnation: 10410027873819012048,
 name: "/device:GPU:0"
 device_type: "GPU"
 memory_limit: 1483053465
 locality {
   bus_id: 1
   links {
   }
 }
 incarnation: 13159812500756175948
 physical_device_desc: "device: 0, name: GeForce GTX 660M, pci bus id: 0000:01:00.0, compute capability: 3.0"]
If it doesn’t work, head to the debugging Section down this page.
5. How to use Tensorflow GPU
Congratulations! Everything is installed properly and you’re ready to have fun with it.
Now how to enable it? There isn’t much to do, it will use the GPU by default if possible. There may be cases where you actually don’t wan the GPU to be used. This would be when using the CPU would be faster. My computer has a good CPU but the GPU is a little old and as a result it takes longer to train a Neural Network on a GPU. On the other hand, Convolutional Neural Networks can be trained 4x faster with the GPU.
There are several ways to disable the GPU but I found the best way is simply by using the ‘with’ command shown below.
with tf.device('/cpu:0'):    # <---- Add this command, and indent your code below

    ### Define, Compile and Train your model
    print('Model was sucessfully trained on the CPU!')
Model was sucessfully trained on the CPU!
Enjoy the best of both worlds!
6. Debugging
6.1. Debug: GPU not detected
If the tests above are not succesful, you should verify that:
- you have restarted your computer,
- your Tensorflow version, CUDA and cuDNN version are all compatible,
- your graphic card is compatible,
- the latest drivers are installed for your graphic card.
6.2. Debug: GPU keeps crashing
Tensorflow-GPU is still a little unstable, especially with old graphic cards, so it might crash every so often. Usually a reboot of the kernel or even the computer can help.
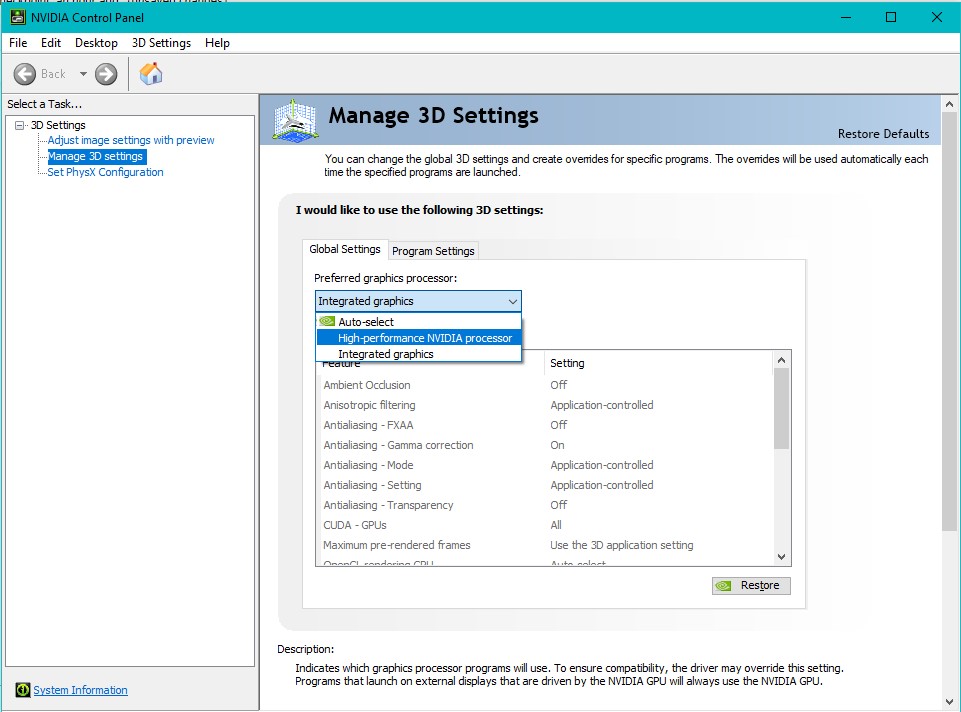
If not, I would suggest the following. On your desktop, right-click on select the “NVIDIA Control Panel”. Select your NVIDIA chip as the “Preferred graphics processor”.
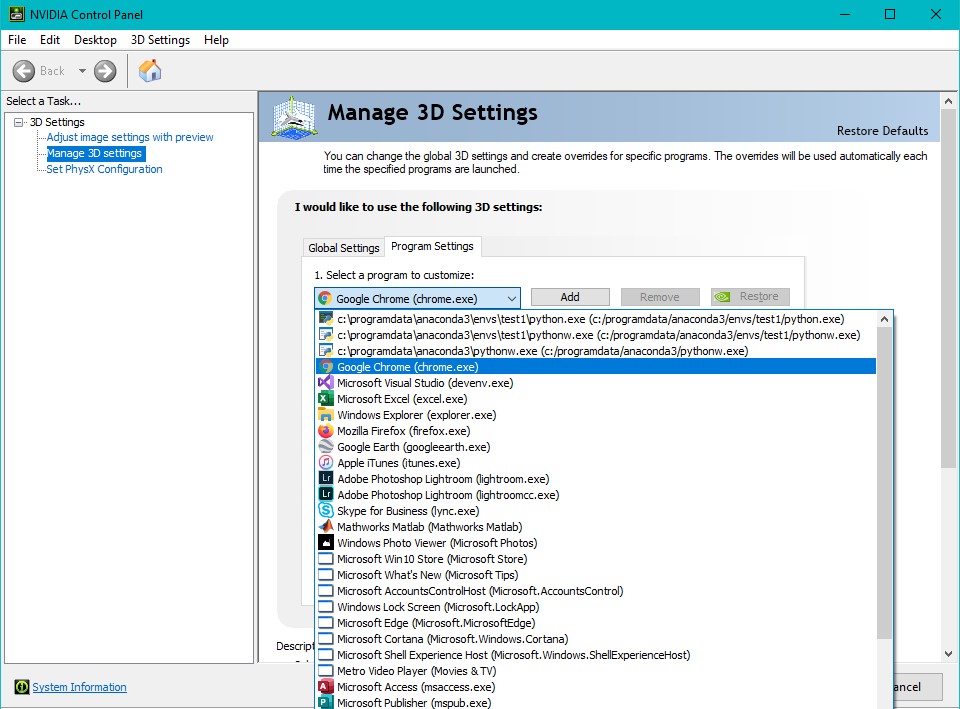
Then go into the “Program Settings” tab, and make sure Chrome (or whatever browser you’re using to run Jupyter Notebook) and most importantly Python default to using the NVIDIA chip. As you can see below, I’ve added python.exe and pythonw.exe from the environment that runs Tensorflow (in the picture below, it’s called “test1”. If you want to be completely safe, also add the Python that’s in the anaconda3 root folder.
6.3. Contaminated Environment
Sometimes, if you’ve been working on your environment for quite a while, it is possible that you have so many packages installed that they create conflict with one another.
In this situation, I advice creating a new, clean environment. To do that, you can visit my post here: https://sdamolini.github.io/Anaconda-Fresh-Start/
![]()